Symptoms: If you ever faced dead slowness in windows 10 even though you have 8 – 16 GB RAM in your system then this article might be helpful for you. When you find Task Manager shows the disk usage in 100% and all the programs will take more RAM space this is caused by the specific Driver StorAHCI.sys. So normally clearing the system temp files, increasing the RAM memory or virtual memory won’t work, it will show the effect for a few days then again the disk usage gets increased. Microsoft clearly mentioned this driver causing the issue, personally, I followed these steps and the issue got fixed. According to Microsoft “While device resets can be caused by a varying number of factors, we are aware of issues with some Advanced Host Controller Interface PCI-Express(AHCI PCIe) models that causes these symptoms in Windows 10 when running with the inbox StorAHCI.sys driver. Due to a firmware bug, the Solid-state drive (SSD) does not properly complete input/output when Message Signaled Interrupt (MSI) mode is enabled. As a result, the Windows storage stack attempts to reset the device after waiting on unresponsive reads or writes for a period of time”.
Method 1: Fixing StorAHCI.sys Driver
- Identify if you are running the inbox AHCI driver (StorAHCI.sys):
- Open a command prompt with administrator privileges. Then type the following command in the command prompt window and hit Enter: msc
- Under IDE ATA/ATAPI Controllers right-click on the AHCI controller node and select Properties. This node is usually called “Standard SATA AHCI Controller.”
- Navigate to the driver tab and click Driver Details.
- If you see “StorAHCI.sys” in the list, you are running the inbox driver.
- Disable MSI for the controller in the registry:
- In the same properties window opened in step 1.2, navigate to the Detailstab and select Device instance path from the Property drop-down menu. Note this path.
- Open the registry editor by typing regedit in the previously opened command prompt.
- Navigate to: HKEY_LOCAL_MACHINE\System\CurrentControlSet\Enum\PCI\ \Device Parameters\Interrupt Management\MessageSignaledInterruptProperties, where refers to the device instance path you noted in step 2.1.
- Change the value of the MSISupported key from “1” to “0”.
- If you don’t know which controller your boot device is attached to, repeat steps 2.1 through 2.4 for all AHCI controllers found under 1.2.
- Reboot the machine.
Method 2: Disable Windows Search
Windows Search is a Windows service that allows users to quickly find and search for files on their computers. It is a search platform created by Microsoft that swiftly finds the most common file and data types. Before Windows Search, this function was known as Windows Desktop Search or WDS. The indexing option allow windows to search for a particular file or folder through entire system. Sometimes this may cause slowness to your system. You can Try this method to disable the widows search. Temporarily disable Windows Search:
- Right-clicking the Start button
- Selecting Command Prompt (Admin)

- Enter the following: net.exe stop “Windows search”

- if you want to enable the windows search back open the command prompt in admin mode and type the below-mentioned command.
- net.exe start “Windows search”
 Note: Click here to know more how to enable or disable windows search through command prompt.
- Once you disable the “Windows Search” check for the disk utilization now, If you still facing the same slowness proceed to next Method.
For Permanent Disable:
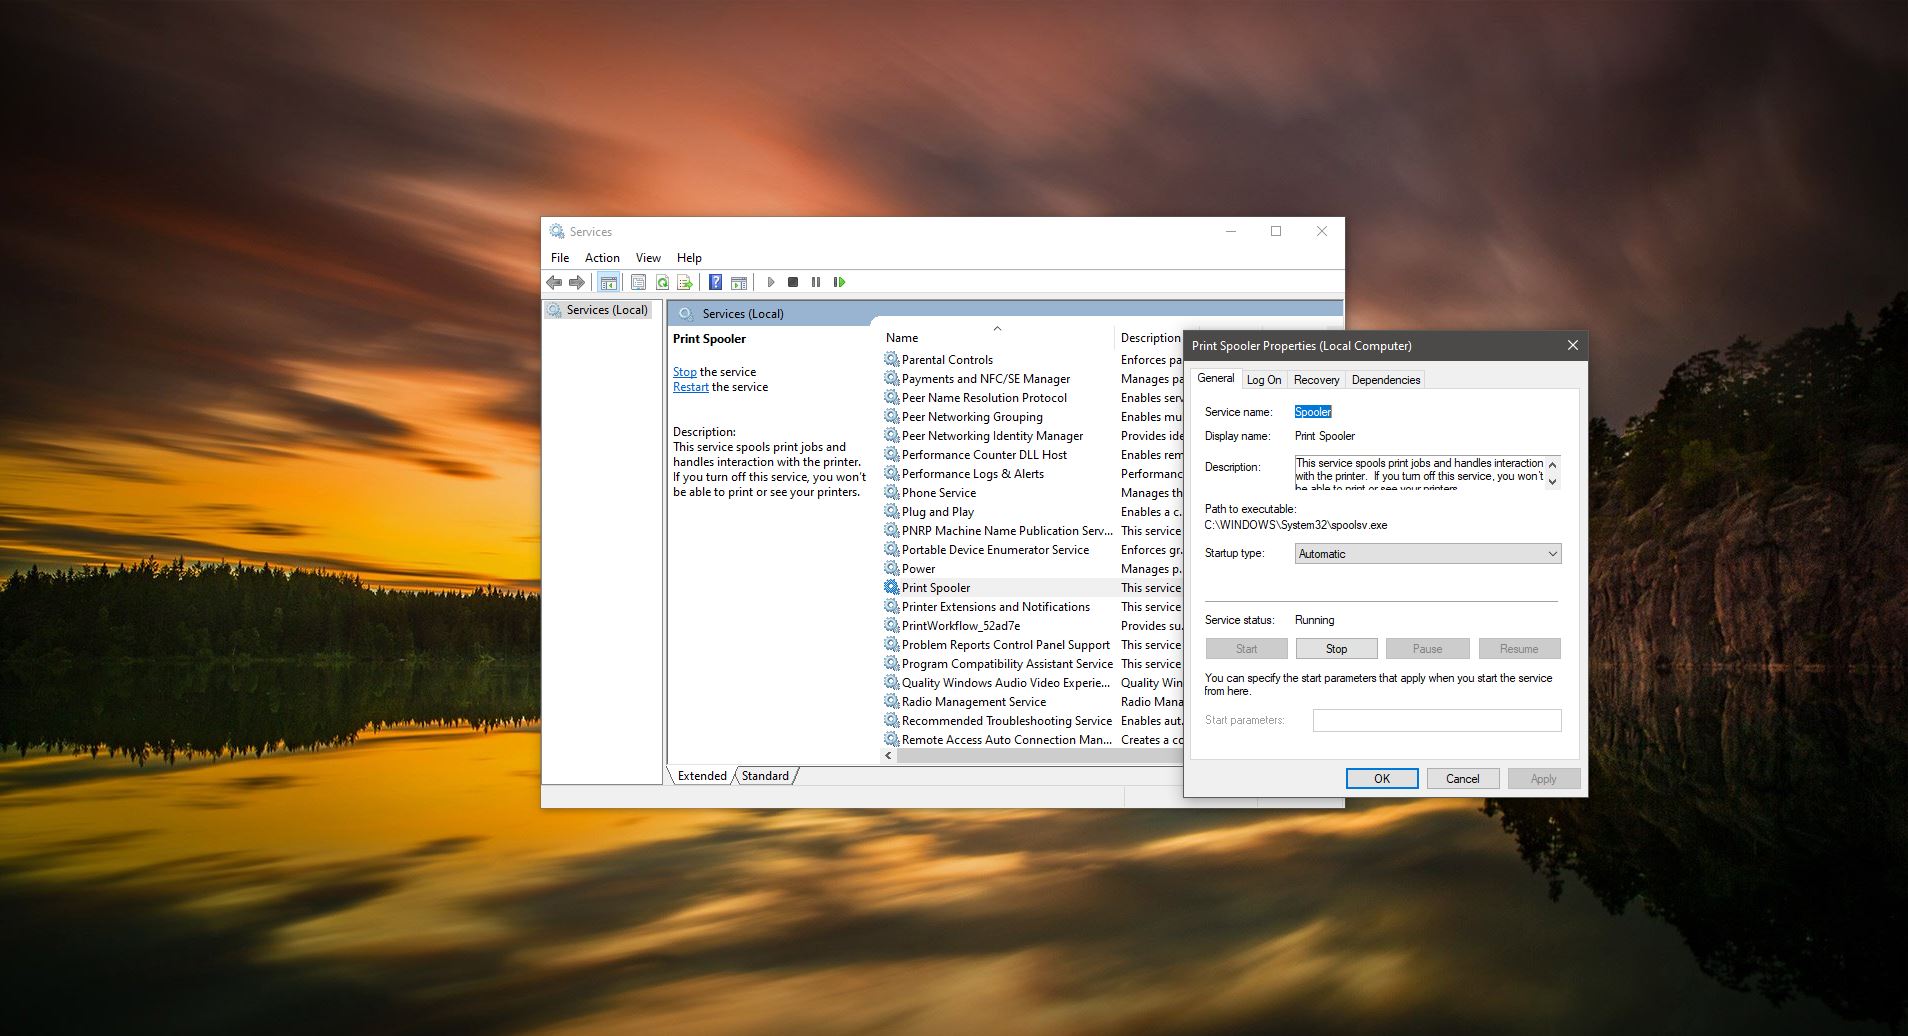
- Open Run command and Type services.msc,
- Once the service management console opens, search for windows search.

- Right click on windows search and choose properties.
- In Properties windows General Tab choose startup type as Disable, click on apply and Ok.
 Note: This will permanently disable the windows search, and this will cause the indexing and search option failure.
- To enable it back follow the same steps above and choose a startup type as automatic.
Method 3: Fixing the Skype
This 100 Percent disk Usage also caused by Skype, Those who uses a Skype or Skype for business always faced this issue. Many users reported the high disk usage when they are connecting to the call through Skype. Try this below mentioned steps to overcome this. This method is for the desktop version of Skype, not for the Windows Store version.
- Start with closing the Skype app. Right-click its icon in the taskbar and click Quit or you can use the Task Manager.
- Now, open This PC or My Computer and navigate to C:\Program Files (x86)\Skype\Phone\
- Right-click the file exeand go to Properties.
- Under the Security tab, select ALL APPLICATION PACKAGES and click Edit.
- On the next box that appears, select ALL APPLICATION PACKAGES, and tick Allowcheckbox for Write permissions.
- Click OKto save and continue. Click OK
 This Method will reduce the usage of memory,while using the Skype.
Method 4: Disabling the SuperFetch
Fixing the 100 Percent Disk usage By Stopping SuperFetch. Steps: Open cmd in Admin mode by pressing windows + X and selecting Cmd admin. Then Type net.exe stop superfetch in the Command Prompt and hit enter. This will stop the super fetch and you can check this in the task manager. Go to task manager and there you can see the change in the disk usage. To revert enter this command below. net.exe start superfetch Alternatively, you can use the ‘services.msc’ utility to disable superfetch on Windows. Like, it’s done for Windows Search. Look for Superfetch in the list of services.
Method 5: Disable Windows tips
Fix 100 Percent Disk usage by Disabling Windows tips Windows 10 Settings includes an option to display tips and tricks. Some users have linked it to the disk usage problem. You can disable tips by visiting Settings > System > Notifications & actions. Turn off Get tips, tricks, and suggestions as you use Windows toggle button.