Wi-Fi is a wireless networking technology that allows devices such as laptops, desktops, mobile devices, and other wi-fi-enabled devices to connect with the Internet. Nowadays many users are using Wi-Fi to connect to the Internet. Internet connectivity occurs through a Wireless router, when you connect to Wi-Fi from your device, you are actually connecting to a Wireless router. The router allows you to connect to the Internet. Wi-Fi adapter can be embedded in your device’s motherboard or you can install the wi-fi module separately. Once you enabled the Wi-fi on your Windows Machine, the device will automatically search for Wi-fi networks and list the number of available Wi-fi networks. Windows 11 offers a lot of customizations options to manage the Wi-Fi adapter. In this article, we’ll see the number of methods to Rename Wi-Fi Network adapter name in Windows 11.
Related: How to Check Wi-Fi Driver Version Using Command Prompt?
Rename Wi-Fi Network adapter name:
In Windows 11 you can easily change the network adapter name using Windows Settings, the new UI changes allow users to change the network adapter name from the Windows Settings.
Using Windows Settings:
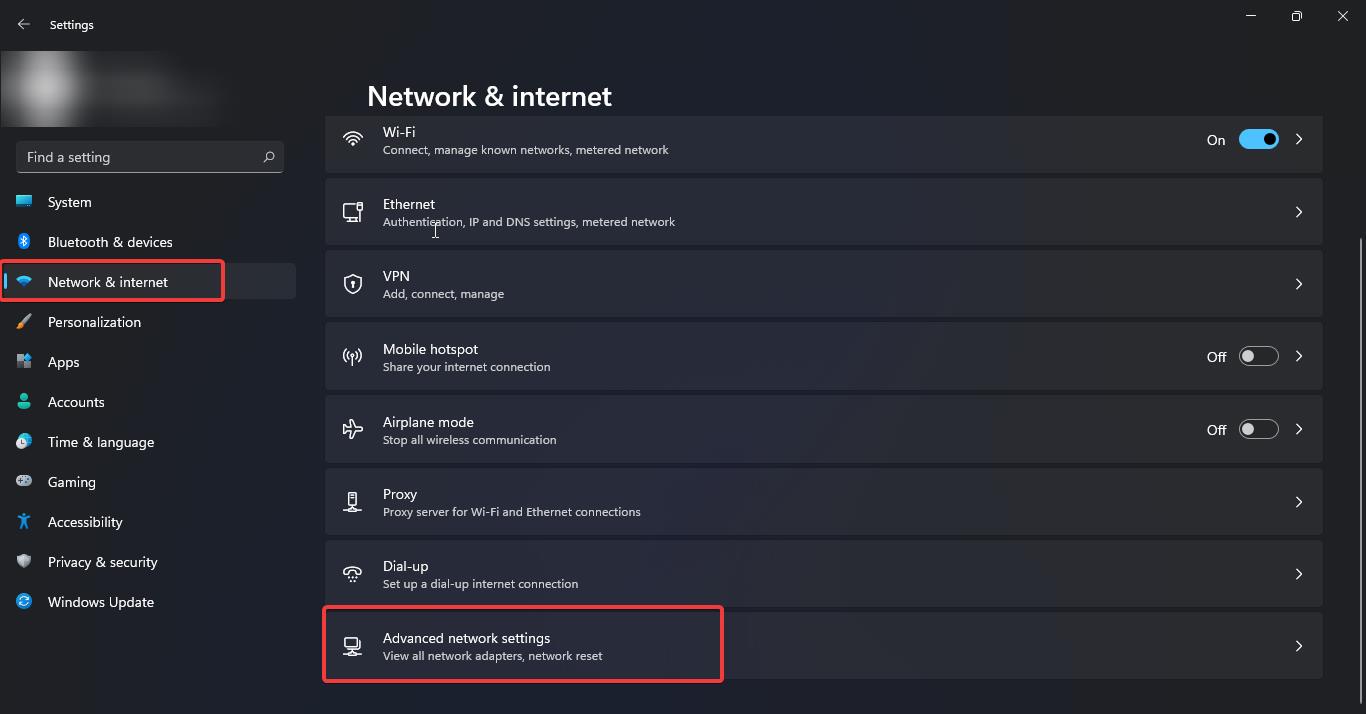
Open Windows Settings by pressing Windows + I and from the left-hand side click on the Network & internet.
From the right-hand side under Network & internet settings page click on the Advanced network settings.
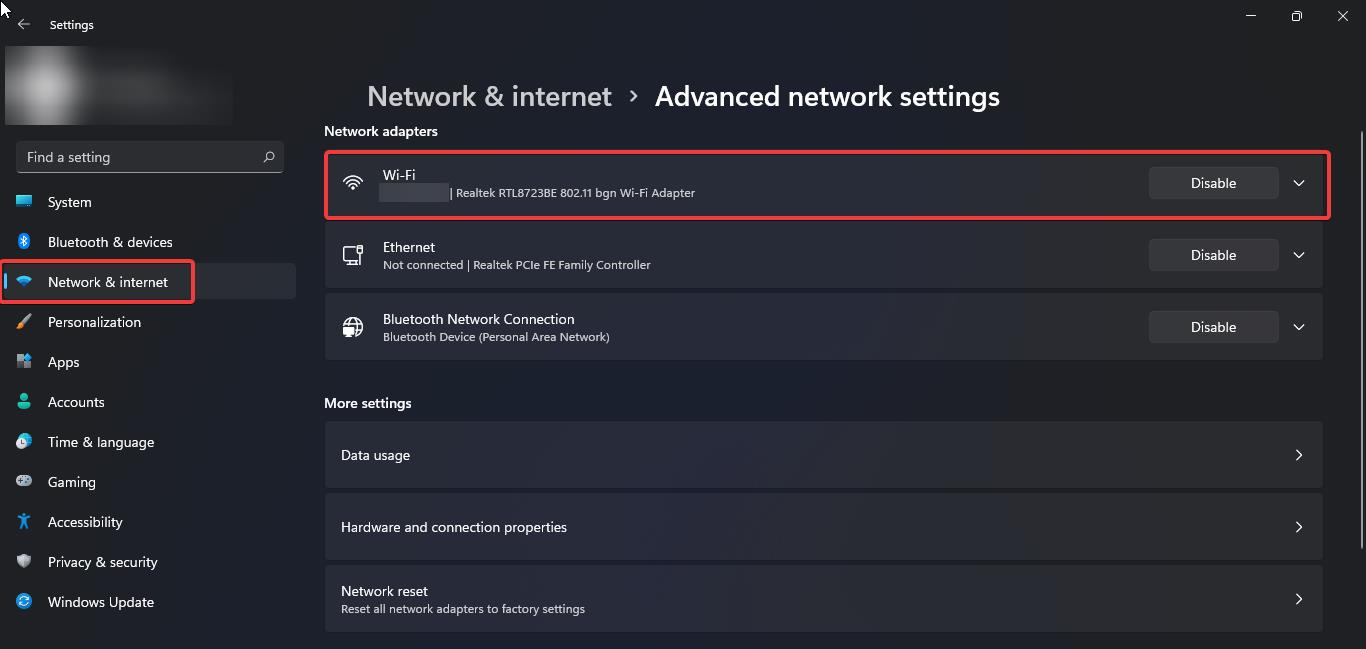
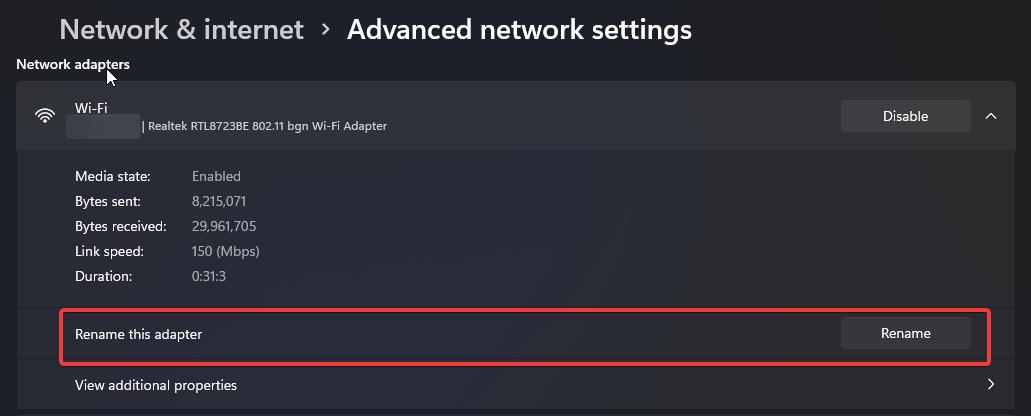
Under Advanced network settings choose the Wi-Fi adapter and click on it.
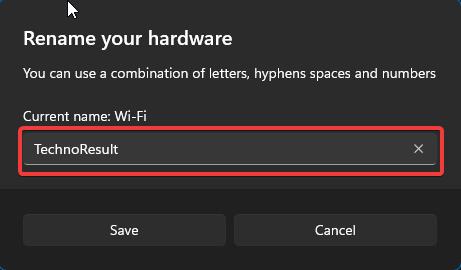
Now you’ll see Rename this adapter option, click on the Rename button. Next, you’ll get one pop-up Rename your hardware.
Enter the new name and click on Save. That’s it the Wi-Fi Network adapter name has been successfully changed.
Using Registry Editor:
Note: Modifying the Registry is risky, and it causes irreversible damage to your OS Installation Follow the steps correctly. Friendly advice Before Modifying Registry Creating Restore Point is recommended.
Open Run command by pressing Windows + R and type Regedit and hit enter, this command will open the Registry Editor console.
Now navigate to the following path.
HKEY_LOCAL_MACHINE\SYSTEM\CurrentControlSet\Control\Network
From the left-hand side right click on the Network registry key and choose Find enter “wi-fi” and click on Find Next.
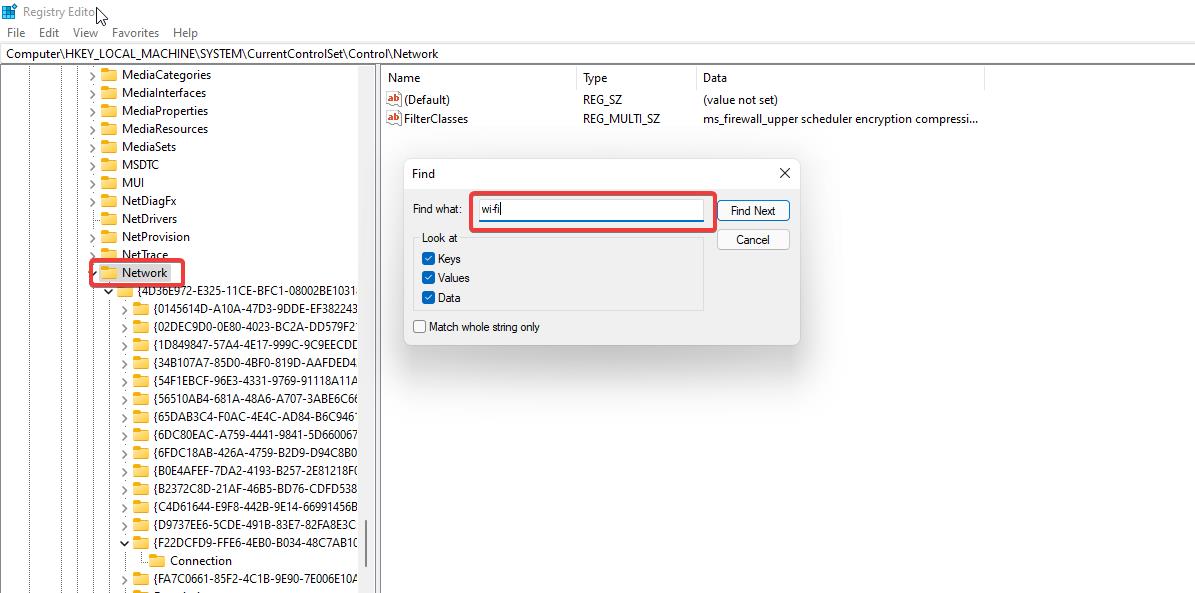
Now you’ll get the exact registry key of your Wi-fi network adapter. Click on the registry key and from the right-hand side right click on the Name String value and choose Modify.
Under Value data field, enter the new name for your Wi-fi network adapter.
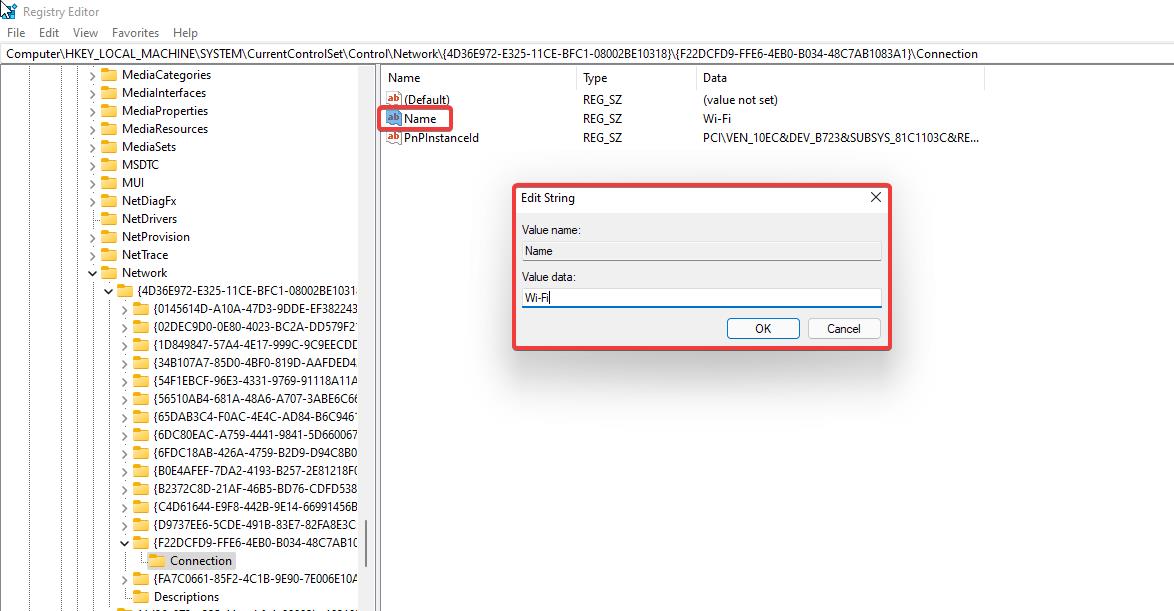
Click on OK and close the Registry editor.
Rename Wi-Fi Network adapter name using PowerShell:
Open PowerShell in elevated mode and type the following command.
Type the following command to identify the network you want to rename.
netsh interface show interface
Type the following command to rename the network adapter.
Rename-NetAdapter -Name “Current Name” -NewName “New Name”
Replace the “Current Name” and the “New Name” and hit enter. This command will rename the Wi-Fi Network adapter name.
Read Also:
How to Delete or Forget Wifi Network Profile in Windows 10?
How to Export all Saved Wi-Fi Passwords in Windows 11?
How to use Multiple Internet connections at same time in Windows 11/10?
How to Reset Network using cmd in Windows 11?
How to Troubleshoot and Fix Wi-Fi Not Connecting Automatically?


