Hyper-V is a Microsoft Virtualization Software that allows users to create virtual computer environments, run and manage multiple operating systems on a single physical server. Hyper-V specifically provides hardware virtualization. Hyper-V virtualize entire hardware components such as hard drives, RAM, and network switches. Virtualization is commonly referred to as Hypervisors. There are many types of Hypervisors available on the market, like Hyper-V, VMware’s ESXi, VSphere, XenServer (Citrix), KVM Open Source Hypervisor, and RHEV. Hyper-V is Microsoft’s version, there are three versions of Hyper-V is available.
Hyper-V for Windows Servers
Hyper-V Servers
Hyper-V on Windows 10.
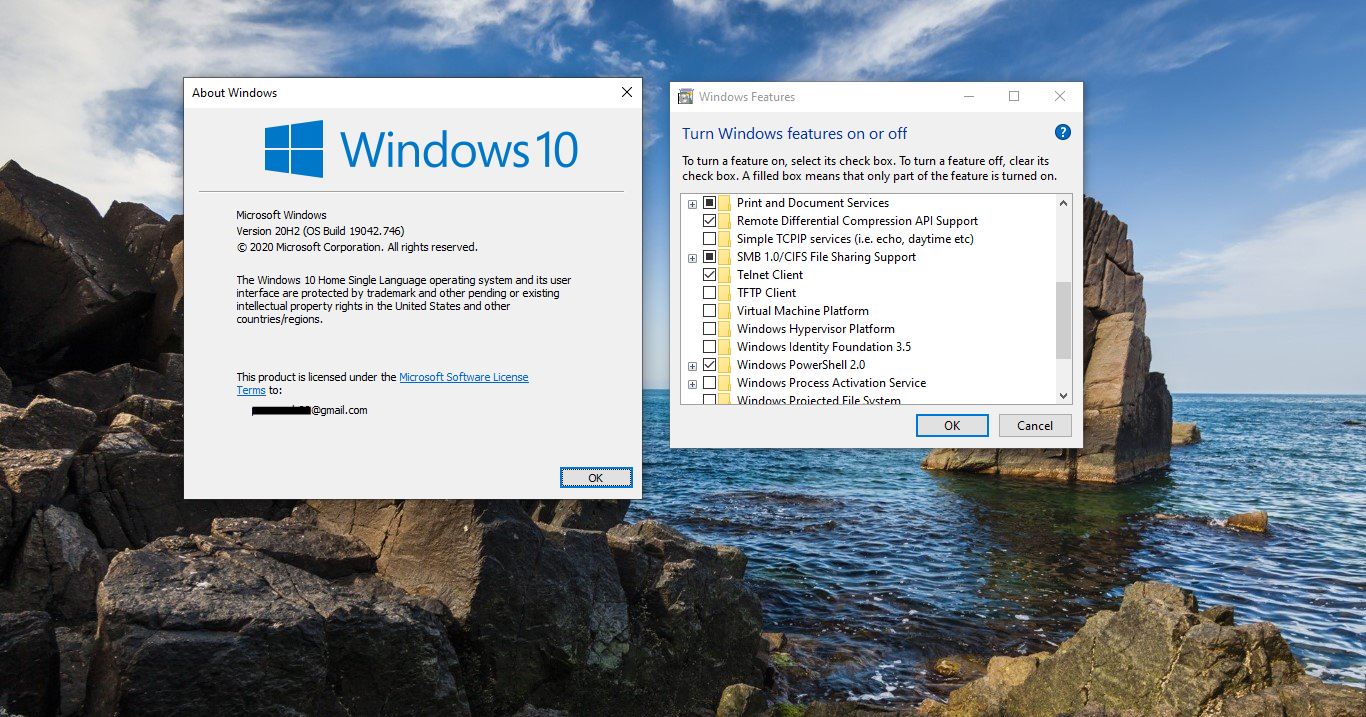
Hyper-V is available on 64-bit versions of Windows 10 Pro, Enterprise, and Education. By default, it is installed on Windows 10 Pro, Enterprise, and Education, you just need to enable this feature from Turn on or Off Windows feature. Hyper-V is not available for Windows 10 Home User, this article will guide you to Enable Hyper-V on Windows 10 Home Editions.
Enable Hyper-V on Windows 10 Home:
Windows 10 Home doesn’t have lot of features like Domain Join, Group Policy Management, Bitlocker, Remote Desktop, Device Guard, Hyper-V, etc., In this article, we will see how to enable Hyper-V home edition using Script. This Script has been created by the Microsoft Virtualization team on Github. Follow the steps below to enable Hyper-V.
Open Notepad and Copy-paste below mentioned code.
pushd "%~dp0"
dir /b %SystemRoot%\servicing\Packages\*Hyper-V*.mum >hyper-v.txt
for /f %%i in ('findstr /i . hyper-v.txt 2^>nul') do dism /online /norestart /add-package:"%SystemRoot%\servicing\Packages\%%i"
del hyper-v.txt
Dism /online /enable-feature /featurename:Microsoft-Hyper-V -All /LimitAccess /ALL
pause
Save the Notepad file as Hyper-V.bat on the Desktop.
Now Right-click on the bat file and choose run as administrator. Next, you will get the UAC prompt click on Yes and you will get the command prompt executing the script. This will take some time.

Once the Script executed successfully, you will get the confirmation message to restart the system Press Y to restart. After the Restart, you will get Hyper-v has an optional feature.

Now open the run command by pressing Windows + R and type optionalfeatures.exe and hit enter this command will open Windows Optional features.
Under Turn Windows Features on or off, Locate Hyper-V and check the Hyper-V management tools and Hyper-V Platform box.
Click on Ok and Restart the system. This will enable Hyper-V on Windows 10 home.
Read Also: